Feeds:
Posts
Comments

Posts Tagged ‘skeleton suit’

The Macdonald Children

Ranald Macdonald, Robert Macdonald and Donald Macdonald, “The Macdonald Children”, by Henry Raeburn (1756-1823).

As the Regency Picnic, held in Melbourne in March, drew closer, the last item of clothing to make for my skeleton suit ensemble was a jacket.

Skeleton suits became increasingly popular during the 1780’s and 1790’s, and they continued to be used until the 1840’s. The jacket was generally long-sleeved (though there are examples of ones with short sleeves) and was buttoned to the matching long pants. The jacket collar varied from a short, stand-up collar, to one with fold-down lapels, and sometimes even no collar. The suit set occasionally included a matching waistcoat that could likewise be buttoned to the pants.

Skeleton suit From

Skeleton suit of brown satin, worn by Danish King Frederik 7th as a boy, c. 1800. From the Danish National Museum. (Patterned and available online)

In the previous posts in this series I have made a little boy’s shirt, and a little boy’s pants to go with the jacket detailed here.

Pattern

I used a pattern online, which was taken from an existing skeleton suit in the Danish National Museum. It does need to be scaled up and then – because it is about an 8-year-old size – I had to adjust it significantly so it fitted a small child. Seam allowances need to be added as well.

I took a raft of measurements and used these to roughly alter the pattern. It is a great idea to do a mock up in cheap fabric, just to make sure you have a workable pattern, before doing the real thing.

Measurements to take:

  • Chest circumference
  • Waist circumference
  • Neck circumference
  • Nape of neck to bottom of jacket
  • Length of shoulder (from side of neck to end of shoulder)
  • Arm length and bicep circumference

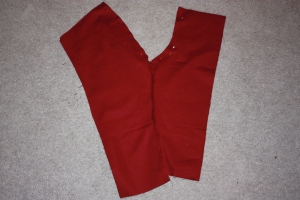
The jacket was made from burgundy cotton broadcloth, with wooden buttons.

Construction Steps

As this pattern comes with minimal instructions, I have decided to detail my steps here.

Step One: After scaling up the pattern and adding seam allowances, I cut out the pieces. In the picture below, the collar piece, facings and cuffs are not shown.

The pattern pieces; from left to right - the front, the back, the undersleeve, the oversleeve.

The pattern pieces; from left to right – the front, the back, the undersleeve, the uppersleeve. Sleeves in this era were generally made from two pieces, like suit sleeves are cut these days.

Step Two: The centre back seam was sewn first, and then the side seams were sewn. The shoulder seams were sewn next. A fitting at this stage helped with the necessary adjustments!

Step Three: The sleeves were sewn together by putting one undersleeve on one upper sleeve right sides together. This means that each sleeve has two seams. Then the sleeves were set into the armhole.

The centre back and side seams have been sewn, and the sleeves are pinned ready to sew.

The centre back and side seams have been sewn, and the sleeves are pinned ready to sew.

The picture below has the sleeves sewn in.

The jacket has

The jacket has the sleeves sewn in.

Step Four: I decided to do a very small, upstanding collar, as was done in the original. The collar piece is folded lengthwise (right sides together) and the two ends are sewn. One of the long edges should be folded up so it can be used later to cover the raw edges.

The collar is folded over (right sides together) and the two ends are sewn. Once edge is folded up so it can be used later to cover the raw edges.

The collar piece, one end sewn and one being pinned to sew, with one of the long sides pinned up.

The collar can then be sewn to the neckline of the jacket. (For tips on how to sew a collar, see Making, Attaching and Finishing a Collar)

Step Five: Facings then need to be sewn (right sides together) to the front of each side of the jacket. Make sure the collar is left in the same position as it was when you sewed it in the previous step, with the seam allowances pointing upwards.

The facing is sewn, right sides together, to the front of the jacket.

The facing is pinned, right sides together, to the front of the jacket. The collar has been left sitting down against the garment, with the seam allowances up.

The facing can then be turned to the inside of the jacket. At this point the raw edges of the collar can be tucked up inside the collar and hand sewn down.

The facing is folded to the inside. There is a small join on the upper corner of the lapel, as I had to piece the material.

The facing is folded to the inside. There is a small join on the upper corner of the lapel, as I had to piece the material. You can see the small, stand-up collar at the top left.

Step Six: The cuffs are cut and sewn together. I just patterned these off the bottom part of the sleeve, adding a little extra for a seam allowance.

The cuffs cut and pinned, ready to sew.

The cuffs cut and pinned, ready to sew.

Then they can be sewn to the arm of the jacket. Make sure the cuffs are sewn with the right side to the sleeves wrong side, as this will mean they are turned to the outside and will hide the raw edge.

The cuff is sewn to the sleeve.

The cuff is pinned (right side cuff to wrong side sleeve), to the sleeve, ready to sew.

The cuff is turned to the outside of the sleeve, and the upper raw edge of the cuff is tucked under. This raw edge will be hand sewn down. A slit is then made through all layers.

A slit is made through all layers.

A slit is made through all layers. The upper edge of the cuff is turned under and pinned, ready to handsew down.

The placket for the buttonholes is sewn. It is sewn in a very similar way to the collar, structurally speaking. This will provide an overlapping flap so that the cuff can be buttoned closed.

The button placket

The button placket sewn, shown wrong side out.

The placket can then be attached to the cuff.

The raw edges are folded in and hand sewn down. The placket is on the right, and the raw edges will be tucked under and hand sewn down.

The placket is sewn on (the “flap” shown on the right). The raw edges of the placket can be hidden inside the placket and hand sewn down. The raw edges on the opposite side to the placket were just folded to the inside and hand sewn down.

The buttons and buttonholes can then be added; I used three on each cuff.

Step Seven: The buttonholes can be sewn and buttons attached on the front; I did a double-breasted front.

The buttons and buttonholes sewn.

The buttons and buttonholes sewn. The jacket has also been levelled and hemmed.

Finally, the bottom of the jacket can be levelled and hemmed.

And to end, here is a picture of the finished outfit at the picnic!

The finished outfit, as worn to the Regency Picnic.

The finished outfit, as worn to the Regency Picnic.

To make this ensemble more versatile for wear during the summer months in Melbourne, I am considering making a waistcoat that could be worn without the jacket. It was quite hot at our picnic, and my children quickly stripped off jackets, waistcoats and cravats, which left them looking much like Mr Darcy before his famed swim in the lake!

Related Posts

Making a Skeleton Suit – a boy’s pants

The Making of a Midshipman: Cutaway Tailcoat

MY Mr Knightley: Making a Regency Tailcoat

Sources and Relevant Links

The 2nd Annual Melbourne Regency Picnic – an Event on the Facebook page

Image Source: “The Macdonald Children” by Henry Raeburn

Gallery of Works by Henry Raeburn

Image Source: A skeleton suit – from the Danish National Museum

Skeleton suit pattern – from Regency Society of America forum boards (This particular page has two patterns, one for a girl’s dress and one for a boy’s skeleton suit. Just scroll down for the skeleton suit pattern.)

Making, Attaching and Finishing a Collar – by Sew Mama Sew

Costume for a Regency Child – by The Oregon Regency Society

Read Full Post »

A skelelton suit From Victoria and Albert Museum.

A skelelton suit made from nankeen, c. 1800. From Victoria and Albert Museum.

My family and I are heading off to a Regency Picnic held in Melbourne in March, so I am madly doing costumes for some of my children who don’t have anything to wear as yet. My two-year-old boy is one of these, and I decided to make him a Regency skeleton suit.

Skeleton suits became increasingly popular during the 1780’s and 1790’s, and they continued to be used until the 1840’s. The suit most often comprised a long-sleeved jacket, with matching long pants (with a fall-front) that could be buttoned together to form a type of romper suit. Sometimes the jacket could be short-sleeved, and the jacket collar varies from a short, stand-up collar, to one with fold-down lapels, and sometimes even no collar.

The suit set occasionally included a matching waistcoat that could likewise be buttoned to the pants. The pants were sometimes more similar to short breeches (reaching only to the knee), but most often were to the ankle. They also could have a button placket at the bottom of the pant leg to aid in dressing. Buttons were often self-covered to match the suit, but could also be metal.

Skeleton suit From

Skeleton suit of brown satin, worn by Danish King Frederik 7th as a boy, c. 1800. From the Danish National Museum. (Patterned and available online)

Underneath this suit the child generally wore a boy’s shirt, which was a version of the man’s shirt popular in the 18th century. In the previous post in this series I made a little boy’s shirt, and in this post I will share my progress in making the boy’s pants.

Pattern

I used a pattern online, which was taken from an existing skeleton suit in the Danish National Museum. It does need to be scaled up and then – because it is about an 8-year-old size – I had to adjust it significantly so it fitted a small child. Seam allowances need to be added as well.

I took a raft of measurements and used these to roughly alter the pattern. It is a great idea to do a mock up in cheap fabric, just to make sure you have a workable pattern, before doing the real thing.

Measurements to take:

  • Waist circumference (a high waist, that is)
  • Hip circumference
  • Crotch to ankle length
  • Crotch to waist length
  • Various measurements around the leg (to check that the pant legs are wide enough)

The pants were made from burgundy cotton broadcloth, with wooden buttons.

Construction Steps

As this pattern comes with minimal instructions, I have decided to detail my steps here.

Step One: I cut out the pattern in a similar way to the breeches I have made before. It is really the shape of the pattern that you want to replicate, regardless of the size of the person. In particular the back panel piece is shaped to give the pants a “splayed leg” appearance, which allows movement for horse-riding. The baggy seat of the pants is part of this.

Step Two: I sewed the two inside leg seams first (the front piece to the back piece), and then I sewed the crotch seam (which is the centre back seam and the centre front seam, joining in the crotch).

The side seams are sewn and the crotch seam is pinned, ready to sew.

The inside leg seams are sewn and the crotch seam is pinned, ready to sew.

Step Three: Before the side leg seams are sewn, it is a good idea to sew the fall front. I did this a bit differently than I have done before. First I laid the front panels together and made a slash through both layers. This made the slashes both even.

The front panel of the pants sits right sides together, and a slash is made for the fall front.

The front panels of the pants sit right sides together, and a slash is made through both layers for the fall front.

Second, I cut a rectangular piece of material about an inch wide and folded (and ironed) 5mm in from each long edge. I sewed this piece (right sides together) to the side of the slash that is closest to the centre front (the one that actually forms the fall front). I used a 5mm seam allowance, tapering to a smaller allowance at the bottom of the slash. The rectangular portion was then folded to the inside to cover the raw edge, similar to the way bias-binding binds raw edges.

The stitching line was hard to see so I have overlaid it with a red line.

This is the inside of the front panel. The slash is parted and folded back and I have marked the stitching line with a red line to make it easier to see.

Third, I cut two pieces to go under the fall; I call them “under-fall-flaps” for want of a better description! These two pieces will be attached to the waistband and to the outer slashed edge. I hemmed the bottom edge of both pieces and also the edges that are closest to the centre front.

These two pieces are places under the fall front.

These two pieces sit under the fall front. Only the bottom edge is hemmed in this photo.

I then sewed these pieces to the other side of the slashed edge, using a seam allowance of 5mm, tapering to a smaller allowance at the bottom. These “under-fall-flap” pieces can then be folded to the inside to sit under the fall. The raw edges do need to be neatened, which I did with a very tight zig zag.

The underpiece is pinned to the other side of the slash, right sides together.

The “under-fall-flap” is pinned, ready to sew, to the other side of the slash, right sides together.

Lastly, I trimmed the bottom of the rectangular piece to form a neat little point. This covers any raw edges at the bottom of the slash, and is top-stitched for reinforcement. I have never done this type of fall front before, but I think it looks really good!

The reinforcing stitching at the bottom of the fall front.

The reinforcing stitching at the bottom of the fall front.

At this point, the outside leg seams can both be sewn. This is also the point that the side pockets can be assembled. This pattern has two pockets (one in each side seam), plus a third welt pocket through the waistband. I did not put any pockets into my pants though.

Step Four: The waistband can be interfaced, especially since it is generally so wide. I sewed the waistband piece and the waistband facing (seen here with the interfacing ironed on) together on three sides, with one long edge of the facing folded up and left unsewn.

The waistband

The waistband sewn, with one edge of the facing folded up. This folded up section is used to hide the raw edges once the waistband is sewn on.

The pants can then be sewn to the waistband. For this part, the fall front is left free (to be buttoned to the waistband later), but the “under-fall-flaps” are sewn to the waistband instead. The centre back portion of the pants is gathered to fit the waistband, thereby providing the baggy seat.

The pants have been sewn to the waistband, and all raw edges have been tucked under the facing and it is pinned, ready to hand sew down.

The pants have been sewn to the waistband, and all raw edges have been tucked under the facing. It is pinned, ready to hand sew down. The fall front can be seen pulled down in the centre.

Step Five: The buttons and buttonholes can be sewn to the front.

The buttons on the fall front.

The buttons on the fall front.

Note: In the pattern, the fall reaches higher than the top of the pants so it can be buttoned on to the waistband. Unfortunately I trimmed it off by mistake, so I had to sew a wide “binder” piece onto the top of the fall to use for buttoning.

Step Six: The button placket on the pant legs was used to help the foot go through tightly fitted pants. These pants weren’t particular tight, but I thought it might be a nice touch to include them. Firstly I cut a rectangular piece of fabric about 2 inches wide and folded it in half. (It needs to be as long as you want your placket to be.) According to the pattern, this placket is actually cut as part of the leg piece but I forgot to include it. The buttons are put on this flap and it is tucked under the other edge to be buttoned up.

The pant legs, shown with a button placket.

The pant legs, shown with a button placket.

The top edge of the placket can be sewn and turned the right way. Once that is done, the long edge of the placket can be sewn to the back side of the leg seam.

The placket sewn on.

The placket sewn on (the longer red line). The top edge of the placket was sewn first and turned the right way (shown by a short red line).

The placket can be then folded to the inside, the raw edges can be tucked under and then it can be sewn down.

The placket has been folded to the inside and pinned down, ready to be sewn.

The placket has been folded to the inside and pinned down, ready to be hand sewn.

On the other seam (opposite to the placket), I sewed a little rectangular piece of material. This was to reinforce it so that the buttonholes could be put here.

On the other side to the button placket, is a small piece of material used as reinforcement for the buttonholes.

On the other side to the button placket, is a small piece of material used as reinforcement for the buttonholes.

Then the buttons and buttonholes can both be put on. I put extra buttonholes in the placket so that, when I let down the pants, all I have to do is put more buttons on the bottom.

The button placket complete.

The button placket complete.

Step Seven: The pants can be hemmed at the bottom. Three more buttonholes should be put in the waistband, at the centre back and one on each side, for buttoning to the jacket.

All finished!

The front view

The front view

The back view

The back view

Stay tuned for the final post in this series, the jacket.

Related Posts

Making a Skeleton Suit – a boy’s shirt

The Making of a Midshipman: Breeches

MY Mr Knightley: Making Breeches

Sources and Relevant Links

The 2nd Annual Melbourne Regency Picnic – an Event on the Facebook page

Image Source: A nankeen skeleton suit – from Victoria and Albert Museum

Image Source: A skeleton suit – from the Danish National Museum

Skeleton suit pattern – from Regency Society of America forum boards (This particular page has two patterns, one for a girl’s dress and one for a boy’s skeleton suit. Just scroll down for the skeleton suit pattern.)

Costume for a Regency Child – by The Oregon Regency Society

Read Full Post »